I didn't really have any "projects" planned, but I never need a plan to find something that I can create!
I had purchased 2 placemats from Target, and I knew that I wanted to turn them into pillow, but I didn't want just plain & boring pillows... so I started thinking!!! I searched Pinterest, and found nothing I loved, so I started searching Etsy. I found something that gave me an idea, and I started to work at my own little version of it! North Carolina is the state both, my husband and I were born and raised in. We met there, we were married there, and we started our family there! We were relocated to Virginia when our daughter was 1, and we continued to grow our family here! Virginia is our long term home now, but both states are home for us!! So...
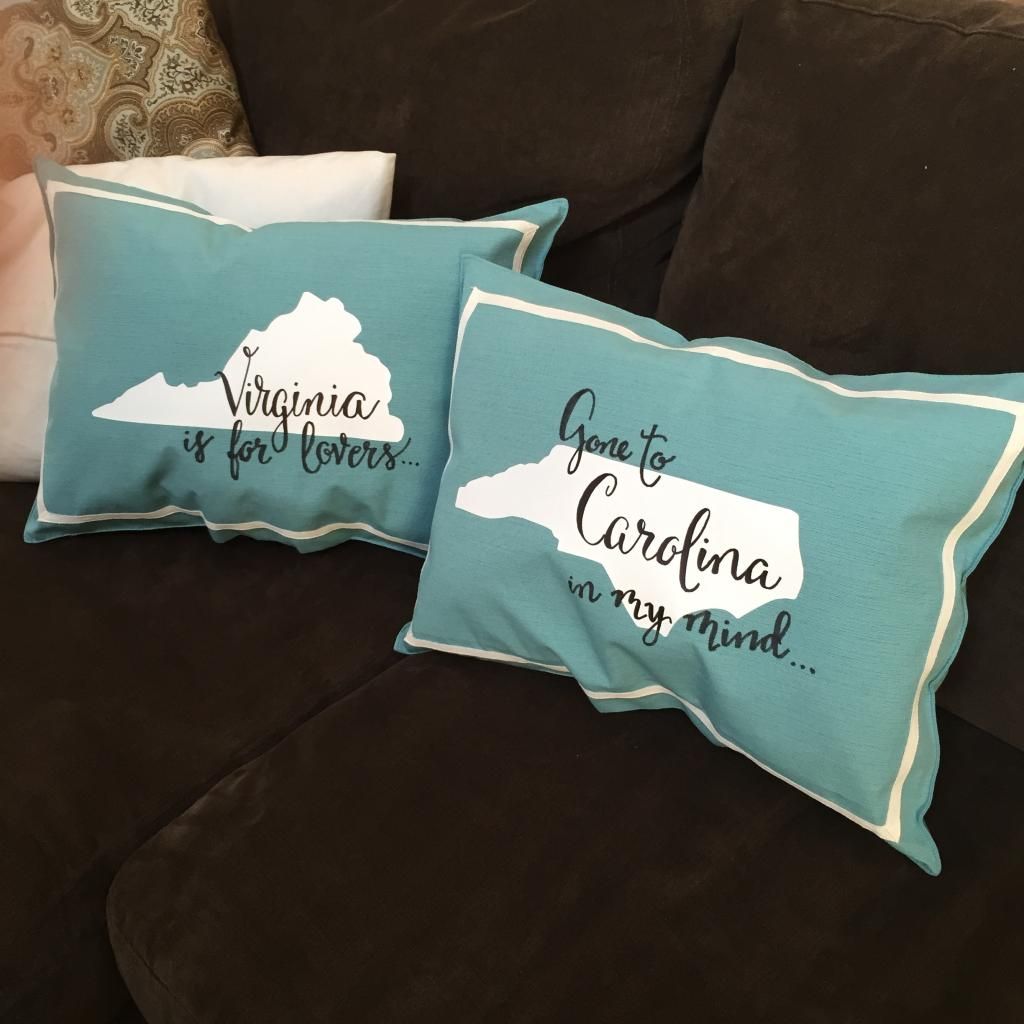
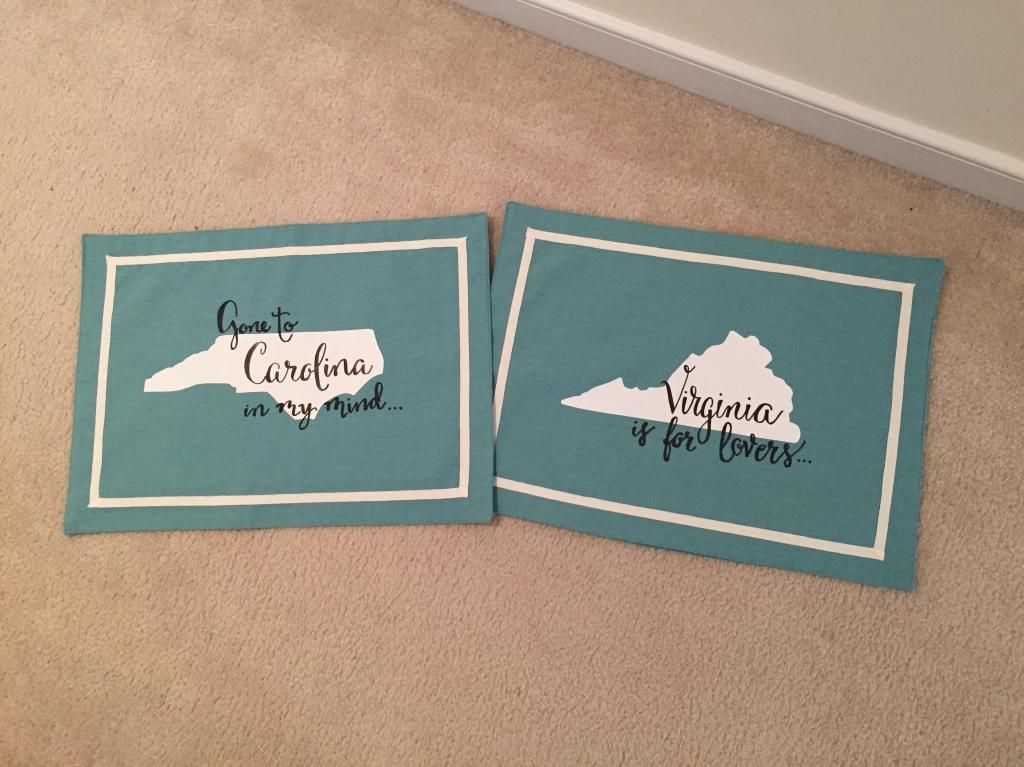
This is what I came up with!!
It was a relatively easy project, so I thought I would walk you through it, just in case you like them so much that you want them in your home!! Keep in mind that you can do this with ANY state, and a cute quote!
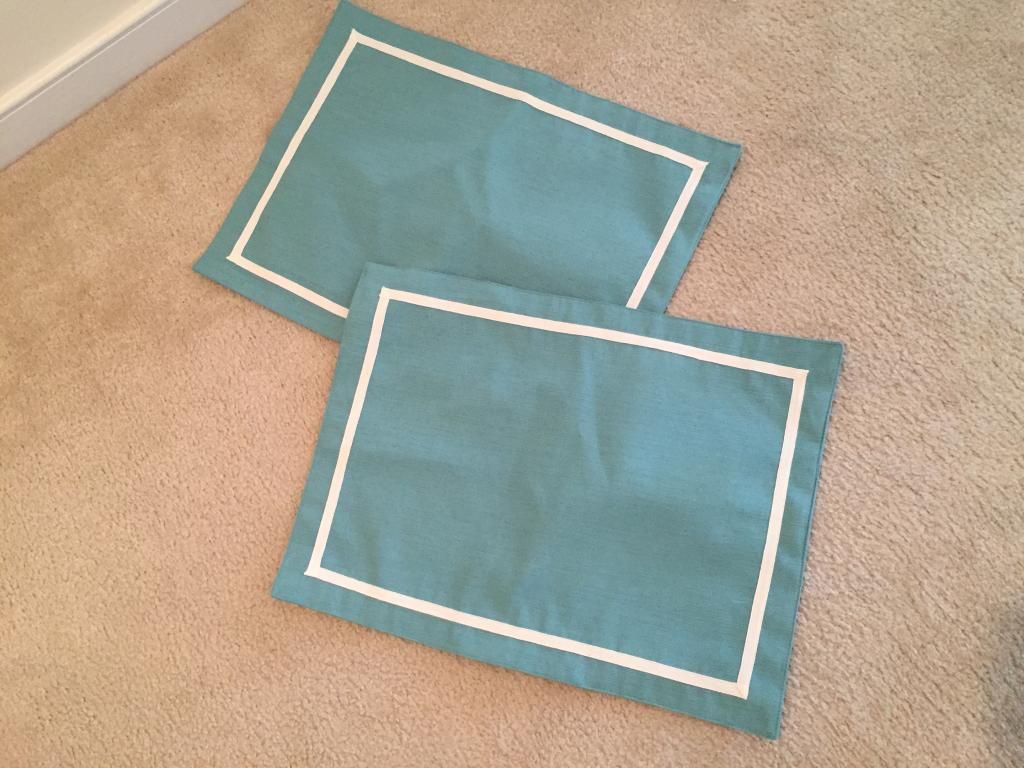
I started with 2 Threshold brand placemats from Target @ $3.99 each.
You don't have to use this brand, but you need to make sure that any placemat you use has 2 sides and 2 pieces of fabric. This project is so simple because this is really an unstuffed presewn pillow!!
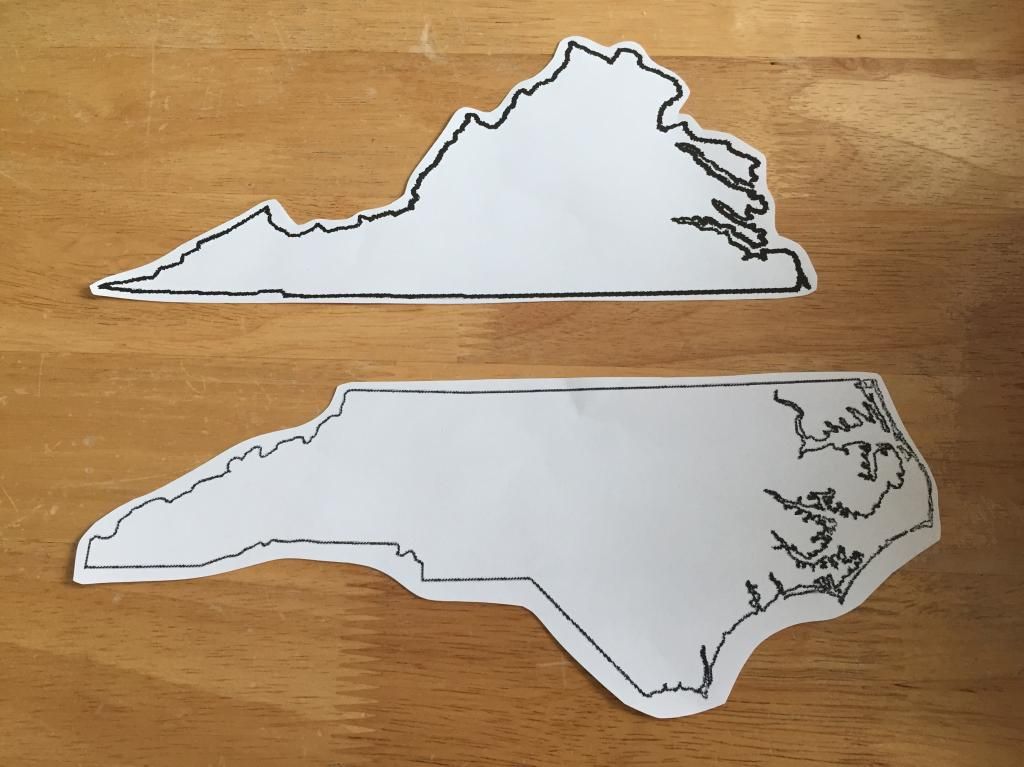
Next, you will need to go to your computer, open WORD, and GOOGLE. Google the state you will be using, and the word "outline". Click the IMAGES option, and choose an image, and copy & paste it into WORD. Drag the size boxes until it is the size you wish, and print it out.
Cut each state out of the paper, as close to the lines as you can.
I taped the images to the backside of a piece of iron on transfer paper. The transfer paper was white, and didn't require the image to be flipped when printed.
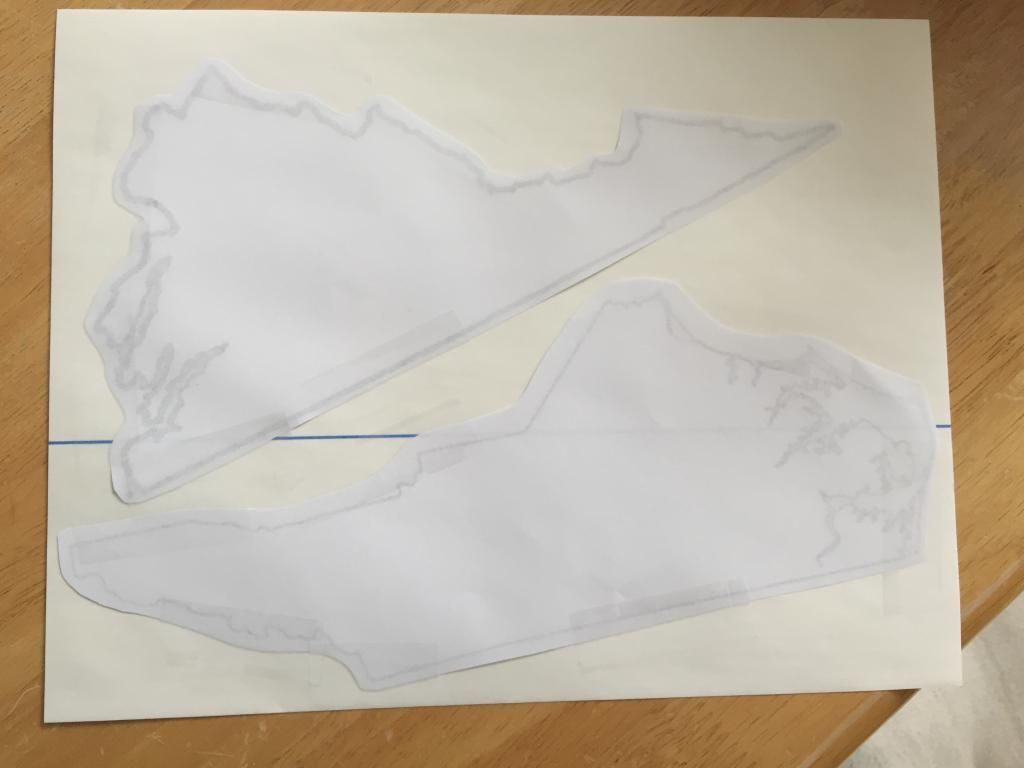
I cut each image out, and removed the backing, so that they were ready to iron on!!
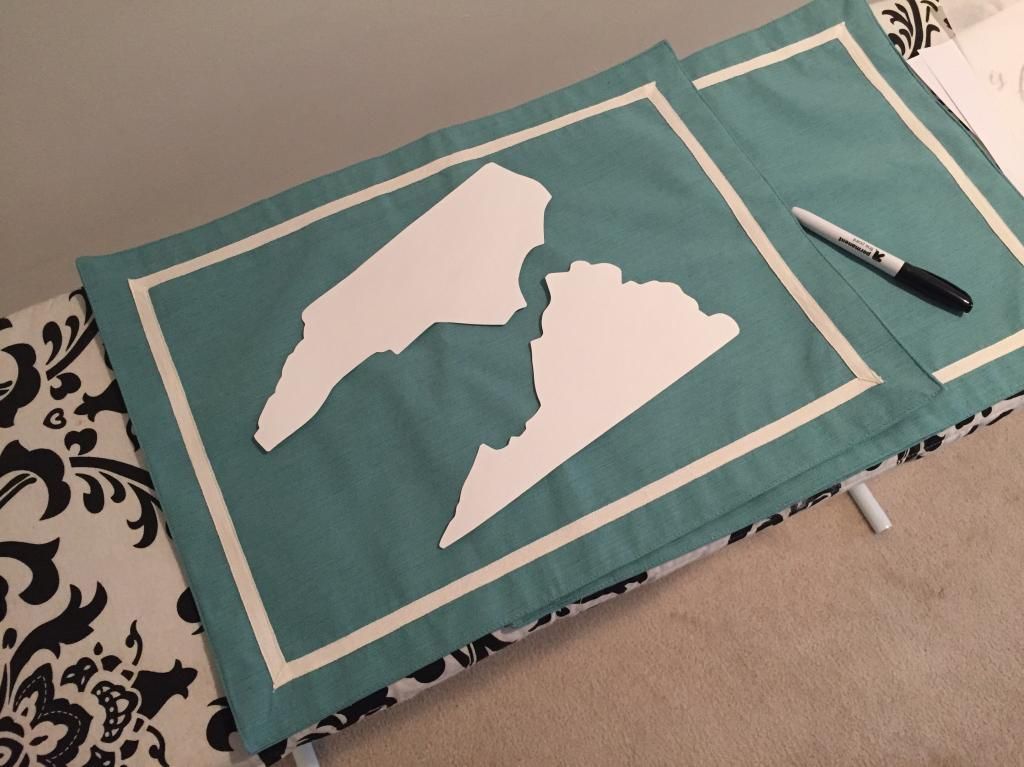
I ironed both states to the pillows, and let them cool completely!
I used the Cantoni font to type in the quotes in WORD, and printed them out,
cutting them into smaller pieces.
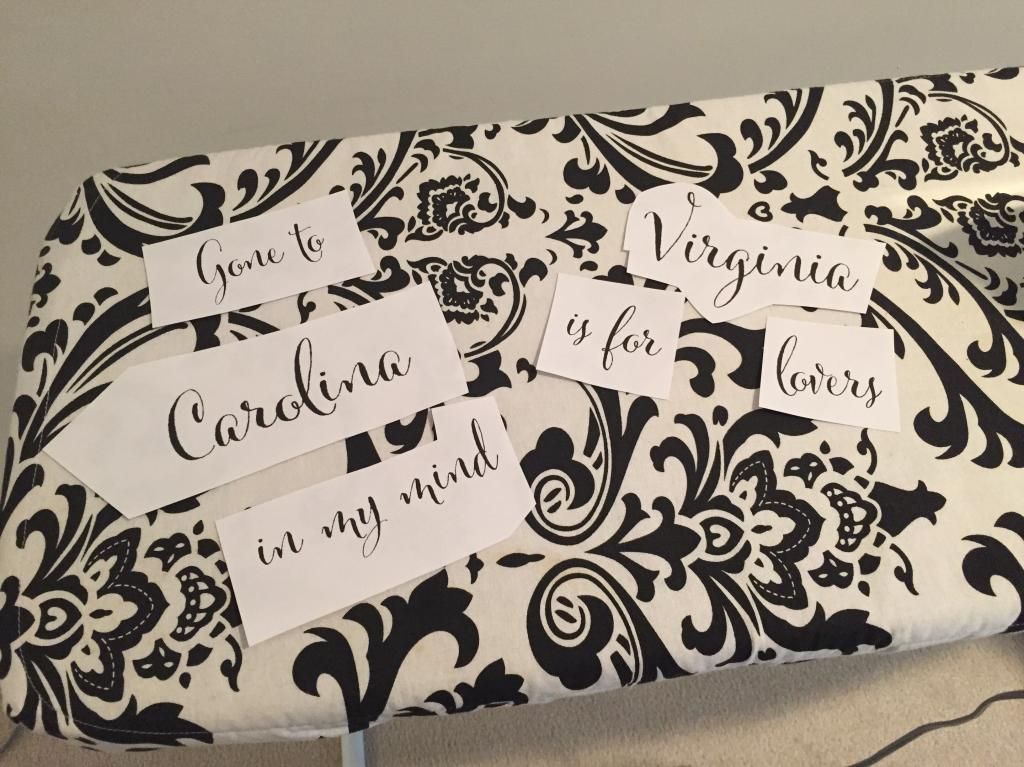
My original plan was to use a permanent marker to trace over these printed letters, so it would bleed through onto the paper, but that didn't work! So, I ended up freehanding the words onto the pillows, but I used these pieces for placement, and size reference.
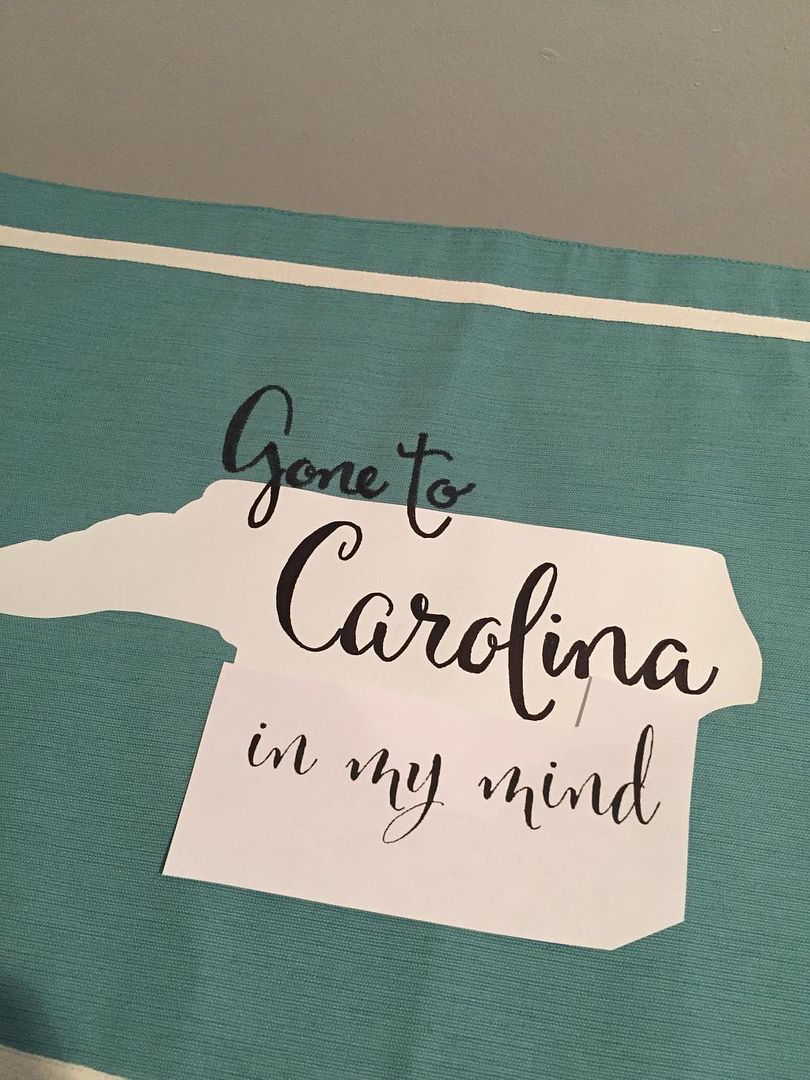
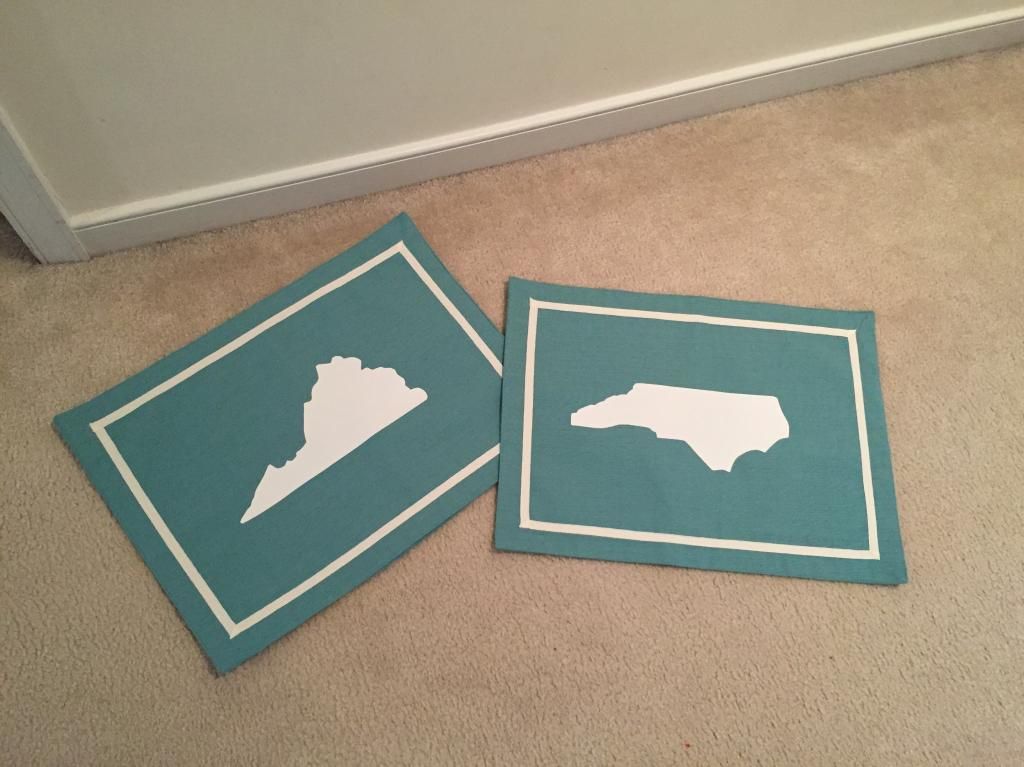
The finished images on the pillows...
The final step is using a seam ripper to bust out the stitching on the bottom of the placemat so it can be stuffed with PolyFil. I need to purchase matching thread, so I can stitch the bottoms of the pillows shut, but I think the finished pillows are sooooo cute!
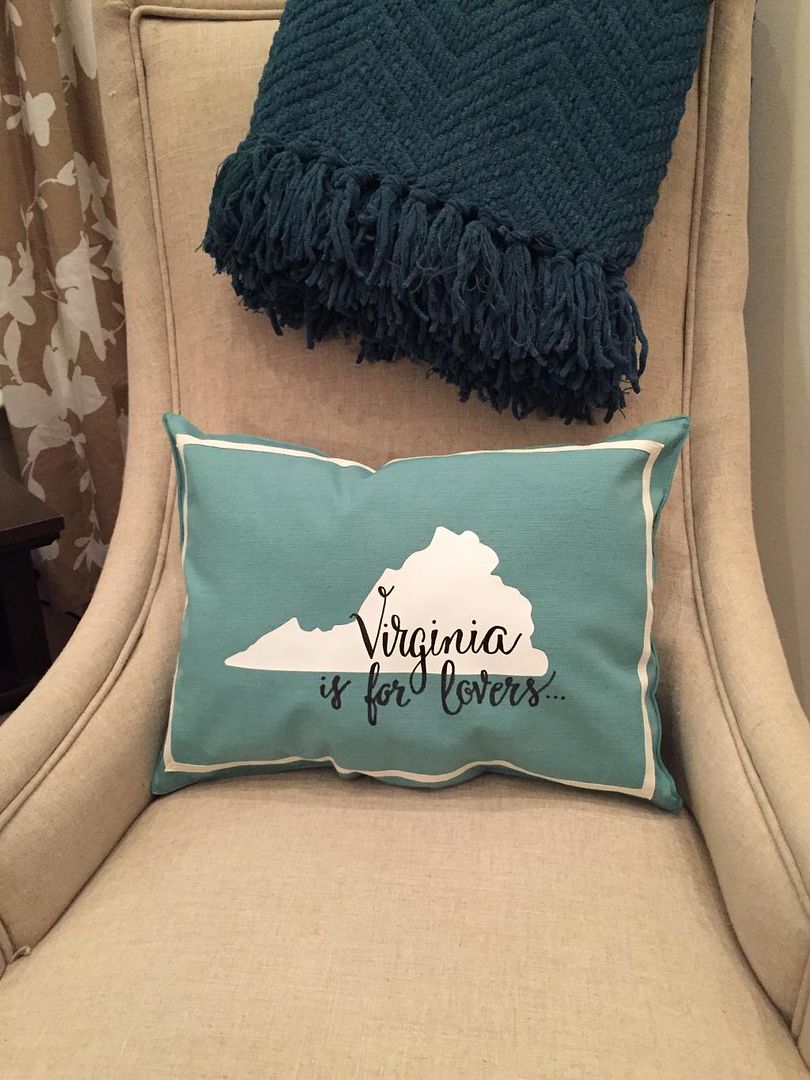
Here is Virginia...
And here is North Carolina...
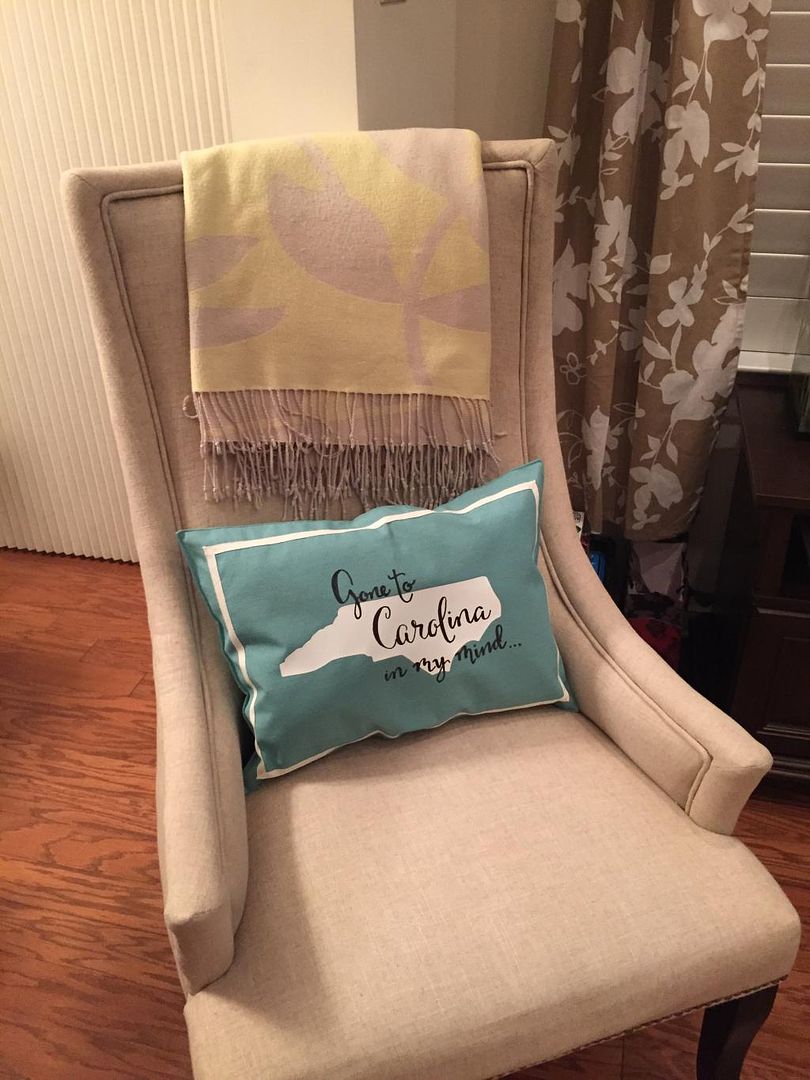
I think these are so cute!!

Hope you enjoy your pillows as much as I am enjoying mine!!


I am so not creative enough to do this! Would you consider making them for me??
ReplyDelete